What to Check Your Drone for Before a Flight? Flight Checks!

In this guide, you will learn What to Check Your Drone for Before a Flight? This comprehensive article covers the essential aspects of drone pre-flight checks to ensure a safe and successful aerial adventure.
Key points:
- Checking Flight Conditions: Discover how to assess weather conditions, altitude, and other critical factors to make informed decisions before taking your drone to the skies.
- Inspecting Battery Health: Learn the importance of monitoring and maintaining your drone’s batteries for optimal performance and longevity.
- Updating Firmware: Understand why keeping your drone’s firmware up to date is crucial, including bug fixes, new features, and enhanced security.
And so much more, let’s dive right in. Whether you’re a novice or an experienced drone pilot, this guide will equip you with the knowledge and insights needed for a safe and enjoyable drone flying experience.
Key Takeaways – What to Check Your Drone for Before a Flight
If you want to know just the simple things about “What to check your drone for before a flight?” then you can take a screenshot of this table, and you might be good to go. But I would recommend that you should keep reading this article.
- Check drone battery charge and storage for optimal performance.
- Keep firmware updated for bug fixes, features, and security.
- Inspect props and airframe for damage to ensure safe flight.
- Always have an SD card for recording drone footage.
- Be vigilant for obstacles and other aircraft in the area.
- Respect no-drone flight signs and follow regulations.
- Properly assemble and tighten all drone components before flying.
- Set the home point for safe drone return in emergencies.
- Configure return-to-home (RTH) height to avoid obstacles.
- Monitor battery level and follow charging guidelines for longevity.
Pre-flight Checklist: What to Check Your Drone for Before a Flight.
This is the first checklist full of items that you should check before flying your drone. You should always check these questions and answer them.
Before you take your drone for a flight, it’s essential to understand what to check your drone for before a flight.
Assessing What to Check Your Drone for Before a Flight is Crucial.
When it comes to taking your drone for a spin, there are a bunch of things to keep in mind – nothing too fancy, just the basic pre-flight drone inspection checklist:
The basic pre-flight drone inspection checklist:
Weather Watch: First off, peek out the window. If it’s blowing a gale, pouring rain, or you can’t see past your nose due to fog, maybe hold off on that flight. Check the forecast and dodge the nasty stuff.
Altitude Alert: Remember, the higher you go, the windier it gets. Check the wind speed and gusts at different heights. No one likes a surprise gust that sends your drone off-course.
Know Your Zone: Make sure you’re not venturing into no-fly zones. Avoid places near airports, military bases, or any spot where they frown upon drones. Look up the local rules, and you’re good to go.
Keep an Eye on the Skies: Look up! Other aircraft might be cruising around. Don’t cramp their style or accidentally cross their path. Keep a safe distance.
Spot the Blocks: Don’t forget to scan for obstacles around your flight area. No one wants a mid-air collision with a tree or a building. Keep it obstacle-free.
Battery Check: Last but not least, juice up your drone. Ensure that it’s got enough battery life to finish the job. You don’t want it to conk out mid-flight.

Oh, and remember, the drone rules can vary from place to place, so always be in the know about local regulations. Now, go have a blast with your drone, and fly safe!
Have you charged the batteries?
For a safe and smooth drone flight, make sure your drone’s batteries are fully charged. Usually, it takes 60 to 90 minutes to charge drone batteries. Neglecting this can cause problems like shorter flight times or sudden power loss during flight.
Checking Battery Charge:
To see how much battery your drone has left, look at the battery display on the drone or the controller. You can also use a charger that shows the battery level for accurate info.
For those who prefer a more precise reading, you can remove the batteries from the drone and use a multimeter to check the voltage.
If you discover that the batteries are not fully charged, you have two options. You can either charge them before taking your drone out for a flight or bring spare batteries with you. However, proper storage practices are also essential to extend the lifespan of your drone batteries.
Battery Storage Tips:
- Keep your batteries in a cool, dry place. Extreme temperatures can damage them.
- Don’t leave batteries fully charged for too long, as it can reduce their capacity.
- Protect your batteries from direct sunlight, as it can harm them over time.
By following these guidelines, you can ensure that your drone batteries remain consistently charged and in optimal condition for flying.
Additional Battery Care Considerations:
- Don’t charge batteries for too long; it can make them hot and possibly harm them.
- Also, don’t let batteries get too empty; it can make them wear out faster.
- Keep batteries in a place that’s not too hot or too cold, and never let them touch water.
- Be gentle with your batteries to avoid dropping or breaking them.

By taking these precautions and maintaining good battery practices, you can not only prolong the life of your drone batteries but also ensure they remain safe for use during your aerial adventures.
Read More: Are Drones Allowed on Catalina Island?
Are the firmware up to date?
One important part of being a responsible drone pilot is making sure your drone and remote control have the latest software updates before what to check your drone for before a flight. This software, called firmware, runs your drone’s hardware, and keeping it up to date is really important for several reasons.
1. Bug Fixes and Performance Improvement
Updating your drone’s firmware is important because it helps fix bugs and problems. These updates make your drone work better and more stable when you’re flying it.
2. Introduction of New Features
Firmware updates usually bring good stuff, like adding new features. These could be things like better ways to avoid obstacles or making your drone fly longer, which makes flying more awesome for pilots.
3. Enhanced Security
Firmware updates make your drone more secure. They include important fixes to protect it from cyberattacks, keeping your drone safe.

Checking and Updating Firmware
To check and update the firmware of your drone and remote controller, you can typically do so through the drone’s dedicated app or website.
Although the specific process may vary depending on your drone’s brand and model, it is generally a straightforward task.
Follow these essential steps for pre-flight drone checks: What to Inspect on Your Drone Before Taking Off
- Make sure your drone is successfully connected to the internet.
- Access the drone’s app or visit its website.
- Navigate to the “Settings” or “Firmware” section.
- Check for any available firmware updates for both your drone and remote controller.
- If updates are accessible, simply follow the on-screen instructions for downloading and installing them.
It’s worth noting that while firmware updates provide many benefits, they can occasionally introduce new issues or bugs.
If you are uncomfortable with the update process, waiting for the next release is a viable option. However, for the reasons mentioned earlier, it is generally advisable to keep your firmware up to date.
Additional Tips for Firmware Updates:
- Ensure your drone has a full battery before starting the firmware update.
- Do not interrupt the firmware update process once initiated.
- If you encounter any problems during the update, reach out to the manufacturer of your drone for assistance.

Follow these rules and make sure your drone’s software is always updated. This way, you’ll get the newest features and safety improvements, making your flights safer and better.
Are the props and airframe in good condition?
As a careful drone pilot, safety should come first. Before you fly, make sure your drone’s propellers and body are in good shape.
The difference between props and airframe
Props play a vital role in a drone’s flight performance as they are responsible for generating lift. Any damage to the props can severely compromise the drone’s ability to fly safely.
Check for signs of wear and tear such as cracks, chips, bending, or warping. If you notice any of these issues, it’s imperative not to proceed with the flight.
The airframe is like the drone’s outer armor. It keeps all the important stuff inside safe from outside things.

Any damage to the airframe can expose the drone to potential harm, whether from the elements or impacts. Inspect for missing or loose screws, dents, scratches, or cracks. Any of these could jeopardize the drone’s integrity.
If you see any damage to the drone’s propellers or body before flying, don’t fly it. Ignoring damage could make the drone malfunction or crash badly.
What to do to maintain drone’s props and airframe?
To maintain your drone’s props and airframe in optimal condition, consider the following tips:
- Avoid Flying in Windy Conditions: Strong winds can strain the props and potentially lead to damage. Whenever possible, choose calm weather conditions for your flights.
- Steer Clear of Obstacles: Flying near obstacles increases the risk of collision, which can cause damage to both the props and the airframe. Maintain a safe distance from objects in your flight path.
- Land Gently: When landing your drone, do so gently to prevent any sudden impacts that could harm the props or the airframe.
- Regularly Inspect for Damage: Develop a habit of routinely inspecting your drone’s props and airframe for any signs of wear, tear, or damage. Early detection can prevent accidents.
Follow these tips to keep your drone’s propellers and body in good shape. This helps prevent accidents and makes your flights safe and fun.
Is there an SD card in the drone?
When preparing to fly a drone, a drone pilot must confirm whether there is an SD card in the drone. This SD card serves as the primary storage for the drone’s photos and videos. Without an SD card in place, the drone will be unable to record any footage during its flight.
Read More: How to transfer photos from DJI Mavic Pro to Computer?
To ensure that you have an SD card ready for your drone, here are some additional steps and tips to consider:
Steps to ensure you have an SD card ready:
Consult the Drone Manual: Begin by checking the drone’s manual. The manual should provide information about the specific type of SD card that your drone requires and where the SD card slot is located within the drone’s body.
Locate the SD Card Slot: Look for the SD card slot on the drone. Usually, you can find this slot on the side or bottom of the drone, although the precise location might vary depending on the drone model.
Properly Insert the SD Card: Once you’ve located the SD card slot, insert the SD card carefully. To prevent any issues with recording or data storage, make sure to insert the card correctly.
Power On the Drone: After securely inserting the SD card, power on the drone. With the SD card in place, the drone will be ready to record photos and videos during your flight.

If you’re not sure whether your drone has an SD card, just check the manual or reach out to the manufacturer for help.
This proactive approach ensures that you have the necessary equipment and settings for a successful and enjoyable drone flying experience.
Read More: What SD card do I need for DJI FPV?
Read More: What SD Card Do I need for DJI Inspire?
The second checklist items: What to Check Your Drone for Before a Flight.
Now it is time to check some other items and answer these questions.
Are there any obstacles in the area?
To ensure a safe and successful drone flight, a drone pilot must possess a thorough understanding of potential obstacles in the area.
Obstacles can vary and may encompass trees, buildings, power lines, or other objects that could pose a threat to both the drone and surrounding individuals or property.
When conducting a pre-flight obstacle check, drone pilots should pay particular attention to the following factors:
Trees: Trees often prove to be a common obstacle for drone pilots, as they may be challenging to spot, especially if they are tall or have thick foliage.
Buildings: Buildings, due to their height and sharp edges, can also present significant obstacles for drones during flight.
Power Lines: Power lines pose a grave danger to drone pilots as they carry high-voltage electricity and can cause severe injury or even death if a drone collides with them.
Other Aircraft: The presence of other aircraft, such as airplanes and helicopters, should always be on a drone pilot’s radar. Being aware of their flight paths and avoiding these areas is crucial to ensure safety.
People: It is equally important to be mindful of people in the vicinity when operating a drone, as drones have the potential to cause harm if not flown responsibly.
Here are some practical tips for effectively checking for obstacles:
Visual Inspection: Before taking off, visually inspect the area where you intend to fly, paying close attention to potential obstacles.
Utilize Obstacle Avoidance Tools: Consider using drone obstacle avoidance apps or software, which can provide real-time obstacle information during flight planning.
Choose a Drone with Obstacle Avoidance Sensors: Opt for a drone equipped with built-in obstacle avoidance sensors for an added layer of safety.
Maintain Awareness: Continuously maintain awareness of your surroundings while operating the drone, as unexpected obstacles may emerge during flight.

By adhering to these guidelines, drone pilots can significantly reduce the risk of accidents and ensure a safe and enjoyable drone flight experience.
Are there any crewed aircraft in the area?
Certainly, before taking flight, a drone pilot should ensure they have good knowledge about the presence of crewed aircraft in the vicinity. This precaution is vital because drones can potentially pose a safety hazard to crewed aircraft, especially if they go unnoticed or, worse if they collide with them.
In the United States, the Federal Aviation Administration (FAA) mandates that drone pilots must diligently ascertain the absence of crewed aircraft before commencing their flights.
Moreover, the FAA imposes strict guidelines regarding the minimum distances that must be maintained between drones and crewed aircraft, which can vary based on the type of drone and the location of the flight.
Tools to facilitate your pre-flight checks:
Drone pilots have access to various tools to facilitate their pre-flight checks for crewed aircraft. These tools include:
Visual Observation: The most fundamental method is for the drone pilot to visually scan the skies for any signs of crewed aircraft, with particular attention to those flying at lower altitudes.
Flight Radar Apps: Numerous flight radar applications are readily available for tracking the real-time positions of crewed aircraft. These apps prove especially useful in areas with significant air traffic, aiding drone pilots in avoiding potential conflicts.
Airspace Maps: Several airspace maps are accessible, outlining the zones where crewed aircraft are restricted from flying. These maps serve as valuable references for drone pilots as they plan their flights within permissible areas.

Understanding the potential risks of operating drones near crewed aircraft is essential, and taking proactive measures to avert collisions is of paramount importance.
By adhering to the FAA’s regulations and leveraging the appropriate tools, drone pilots contribute to a safer and more enjoyable flight experience for all.
Are there any printed signs that prohibit drone flight?
Yes, there are printed signs that prohibit drone flight. These signs are typically found in areas where drone flight is prohibited for safety reasons, such as near airports, military bases, and prisons.
The signs typically have a red circle with a diagonal line across a drone symbol, and they may also have the words “No Drones” or “Drone Flight Prohibited”.
Prohibited Areas
Here are some of the places where you may see printed signs that prohibit drone flight:
- Near airports
- Over stadiums and other sporting events
- Near prisons and other sensitive facilities
- In national parks and other protected areas
- Within a certain distance of power lines and other infrastructure
- In areas where there is a lot of air traffic, such as near busy highways

Legal Consequences
It is important for drone pilots to be aware of the signs that prohibit drone flight and to avoid flying in these areas. Flying a drone in a prohibited area is a violation of the law and could result in fines or other penalties.
By respecting these restrictions and being mindful of the signs, drone operators can ensure safe and responsible flying while avoiding legal consequences.
Is the drone properly assembled?
Before taking flight, any drone pilot must confirm that their drone is correctly assembled. This preliminary step ranks among the most vital aspects to address before each flight.
An improperly assembled drone not only poses a significant safety risk but also jeopardizes the integrity of the drone itself and the well-being of people or property.
When assembling a drone, there are several key checkpoints to consider:
Firstly, ensure that all the various components are appropriately connected, forming a coherent and functioning unit.

Secondly, meticulously inspect the drone for any signs of loose screws or bolts. Tightening them securely is imperative to avoid mid-flight mishaps.
Moreover, it’s vital to double-check that the propellers are firmly and correctly attached. Proper propeller attachment is essential for stable and safe drone operation.
Additionally, maintaining proper balance is essential to ensure smooth and controlled flight. A well-balanced drone performs optimally and minimizes the risk of erratic behavior during flight.
For drones equipped with cameras, it’s imperative to confirm that the camera is mounted correctly. An improperly mounted camera can lead to subpar footage or even damage to the camera itself.
If you find yourself uncertain about the assembly process, it’s advisable to consult the drone’s manual. The manual provides invaluable guidance, ensuring that you assemble your drone correctly and fly with confidence.
By adhering to these assembly checks and consulting the manual when needed, drone pilots can significantly enhance safety, protect their equipment, and maximize the enjoyment of their flying experience.

Is the home point set?
A drone pilot should always be aware of whether the home point is correctly set before What to Check Your Drone for Before a Flight. The home point serves as the designated location that the drone will automatically return to in case it loses connection with the controller or its battery runs critically low.
Setting this home point before flying is a crucial safety measure to ensure the drone can return to a secure location if unforeseen issues arise.
To establish the home point on a DJI drone, you can easily follow these simple steps:
- Power on both the drone and the controller.
- Confirm that the drone has acquired a strong GPS signal.
- Within the DJI Fly app, locate and tap the three dots located in the top right corner of the screen.
- From the menu, select “Flight Settings.”
- Then, tap on “Home Point Settings.”
- Finally, select “Set Home Point.”

Once completed, you’ll hear a confirmation beep and a green home point icon will appear on the map within the DJI Fly app. This icon serves as a visual indicator of the precise location the drone will return to in case of a connection loss or low battery.
Remember that you have the flexibility to adjust the home point during your flight. You can do so by repeating the same steps mentioned above.
Additional Home Point Tips:
Here are some useful tips to consider when setting the home point:
- Always ensure that the drone establishes a strong GPS signal before designating the home point.
- Choose a home point location that is free from obstacles and guarantees the drone’s safe return.
- In environments with tall buildings or other obstructions, it may be wise to set the home point at a higher altitude to avoid obstacles during the return journey.
- In areas where GPS signal strength is weak, you can set the home point to the controller’s location, ensuring a reliable reference point for the drone’s return.
By following these guidelines and taking these precautions, you can help guarantee that your drone will reliably return to a secure location in case of any unexpected circumstances during your flight.

Is the return to home (RTH) height set?
A crucial consideration for any drone pilot is ensuring that the return to home (RTH) height is properly configured before taking flight.
The RTH height specifies the altitude at which the drone will autonomously return to its designated home point if it encounters issues like signal loss, low battery, or other operational problems.
Setting the RTH height to an appropriate level is vital to ensure a safe return without any potential collisions with obstacles.
To configure the RTH height, you’ll need to access the drone’s settings menu. While the exact steps can vary based on the drone model, the general procedure remains consistent:
- Open the drone’s settings menu.
- Locate the RTH height setting.
- Input your desired RTH height in either meters or feet.
- Save the adjusted settings.
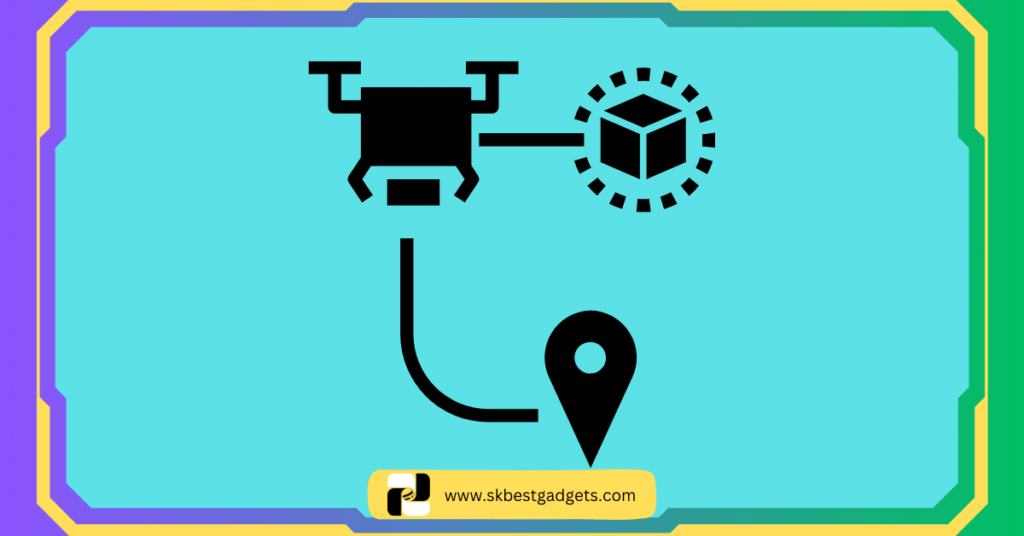
The recommended RTH height varies depending on factors such as the drone’s model and the flying environment. As a general guideline, starting with an RTH height of around 100 meters (approximately 330 feet) is often a safe choice, allowing the drone to return without encountering most obstacles.
It’s essential to understand that setting the RTH height does not guarantee an incident-free return. In cases where the drone loses signal or faces a low battery at a high altitude, it may not reach its home point before encountering difficulties.
Therefore, responsible drone operation and avoiding risky conditions are equally important.
Tips to consider when setting the RTH height:
- Assess the surrounding environment for potential obstructions like tall buildings, which may necessitate a higher RTH height.
- Account for the drone’s weight; heavier drones may require a greater RTH height for stability during the return journey.
- Be mindful of wind conditions; strong winds may necessitate a higher RTH height to ensure a safe return.
- Consult the drone’s manual for manufacturer-recommended RTH height specific to your drone model.

By following these guidelines and considering the various factors at play, you can ensure that your drone’s RTH height is appropriately configured, contributing to safe and responsible flight operations.
Read More: How to remove DJI height limit?
The Final checklist items: What to check your drone for before a flight?
Now this checklist contains those items that you should check after the flight.
Are the batteries damaged?
A responsible drone pilot must perform a post-flight battery check to ensure the batteries remain undamaged before What to Check Your Drone for Before a Flight. Several telltale signs can indicate battery damage, and it’s essential to be vigilant:
Swelling: One of the most apparent signs of battery damage is swelling. When a battery swells, it indicates that the cells inside have expanded. Swelling may result from overcharging, overheating, or physical damage. If a battery is swollen, it should under no circumstances be used.

Discoloration: Another indicator of battery damage is discoloration. This discoloration may manifest on the battery’s exterior or within the battery cells themselves. Regardless of where it occurs, a discolored battery should not be used.
Leaking: Discovering a leaking battery is an alarming sign of severe damage. The fluid that leaks from the battery can be corrosive and pose a threat to your drone. Under no circumstances should a leaking battery be used.
Popping or Cracking: When a battery starts popping or cracking, it signals a thermal runaway event, a highly perilous condition. In this case, immediate disposal of the battery is crucial.
Should any of these signs of battery damage become evident, it is imperative not to use the battery any further. Instead, you must ensure its proper disposal.
Instructions for disposing of drone batteries in your locality can typically be obtained by contacting your local waste disposal company. Taking these precautions ensures both your safety and the longevity of your drone equipment.

Are the batteries charged?
A drone pilot should be aware of the battery status immediately after a flight for two crucial reasons. Firstly, it ensures that the drone is prepared for the next flight, ensuring smooth operation when needed. Secondly, it prevents the batteries from overcharging, which can lead to damage and reduced longevity.
To ascertain the battery level, the most reliable method is to utilize the drone’s built-in battery indicator. Typically, this indicator takes the form of a light or a display on either the drone itself or the remote controller.
If the battery level is found to be low, it is imperative to recharge the batteries before embarking on another flight.
In addition to monitoring the battery indicator, adhering to the manufacturer’s charging instructions is equally vital. This ensures not only safe charging practices but also prolongs the lifespan of the batteries.

Tips to effectively check a drone’s battery level:
- Check the Battery Indicator: Begin by examining the battery indicator on either the drone or the remote controller. This built-in feature provides a straightforward way to gauge the battery’s charge status.
- Battery Weight: In cases where the battery indicator is not available or not functioning, another method involves weighing the batteries. A fully charged battery typically has more weight than one that is only partially charged.
- Manufacturer’s Instructions: If you are uncertain about how to determine the battery level or need guidance on safe charging practices, it is advisable to refer to the manufacturer’s instructions. This valuable resource will offer comprehensive insights into your specific drone’s battery management.
By diligently following these recommendations, you can ensure that your drone’s batteries remain consistently charged and primed for flight whenever you need them.
Is the airframe damaged?
A drone pilot must conduct a thorough inspection of their airframe following each flight. This practice remains vital, even when a flight has gone smoothly without any significant incidents.
The purpose behind this routine check is to detect and assess any potential damage, no matter how minor it may seem at first glance.
Such seemingly minor issues could ultimately have a notable impact on the drone’s performance and safety.

Therefore, a post-flight inspection serves as a proactive measure to ensure the drone remains in optimal condition and ready for subsequent flights.
Important FAQs
Checking flight conditions ensures safety and optimal drone performance. Weather, visibility, and wind conditions are crucial factors to consider.
You can check the battery charge using the drone’s built-in battery indicator, a battery charger with a level indicator, or a multimeter for a precise reading.
Updating firmware provides bug fixes, introduces new features, and enhances security, contributing to a safer and improved flying experience.
Signs of wear and tear, such as cracks, chips, bending, or warping, should be checked on the props. The airframe should be inspected for missing or loose screws, dents, scratches, or cracks.
Consult the drone’s manual to find information about the required SD card type and location of the SD card slot. Ensure the SD card is properly inserted before the flight.
Final Thoughts for what to check your drone for before a flight:
In summary, “What to Check Your Drone for Before a Flight” is your essential guide to safe and successful drone flying. Whether you’re a novice or an experienced pilot, these pre-flight checks are crucial.
Remember, your insights matter, so share your thoughts, tips, or questions in the comments below. Let’s build a safer and more enjoyable drone community together. Don’t forget to hit that share button and spread the drone love.
What SD Card Do I Need for The DJI Mini SE? (A Comprehensive Guide) (2023)
Upgrading your DJI Mini SE’s storage game? 🚁📷 Dive into this 2023 guide! Discover the best SD card to capture every epic moment. Don’t miss out on your high-flying adventures! 🌟📸

